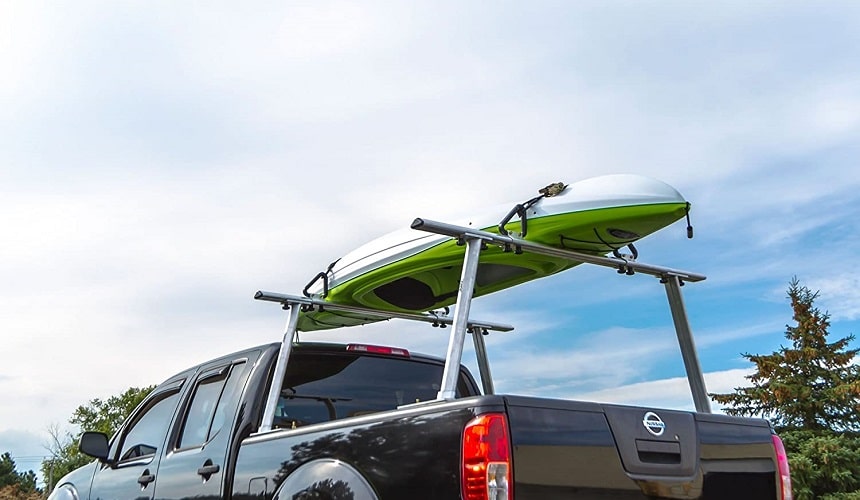

Going out on Kayaks is a very refreshing activity that several people are fond of. However, the use of a kayak is greatly restricted to water bodies such as fast-flowing rivers, lakes, and the likes. One major problem that kayak users face is getting their kayaks from their homes to the location where they can use them.
In light of this problem, people have come up with a solution, and the solution is in the form of kayak roof racks. This article will focus on how to install kayak roof racks and some other things you should know about your kayak roof rack.
Before we go into how to install kayak roof racks, let’s first get familiar with the roof rack structure. The Kayak roof rack is not just a single unit of equipment; instead, it is made up of some smaller components that are coupled together. Let’s take a look at some of the parts of the roof rack.

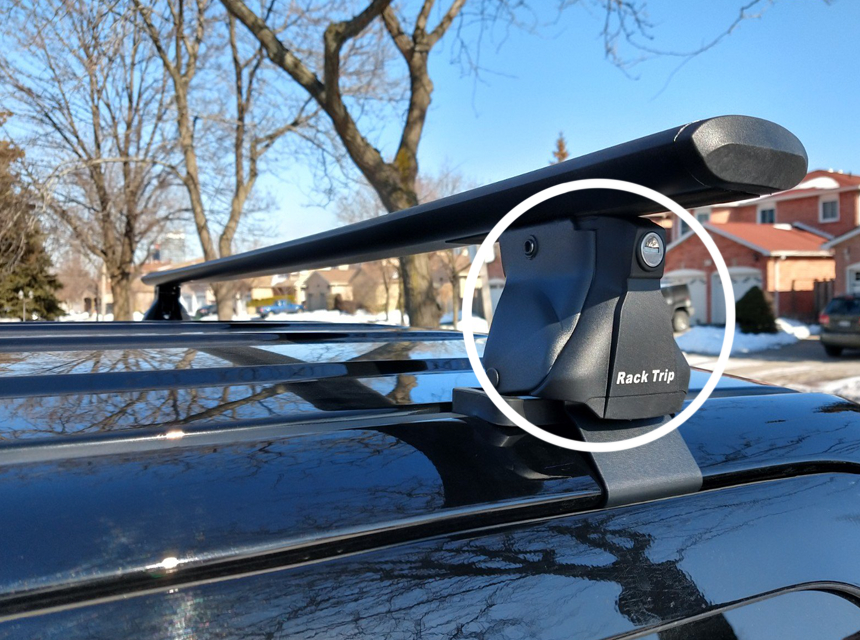
The mount is the first component that makes up your roof rack, and it is essential before you can go on to set up the rest of your rack. The mount is the component of the rack that is attached directly to your vehicle’s body, and you can call it the base of your rack or the foundation of the rack. The mount usually serves as a base for you to attach the tower.
The mount comes in different forms based on how they can be fixed to your vehicle, some are fixed using screws, and there are some that are locked in place with a key or lock mechanism.
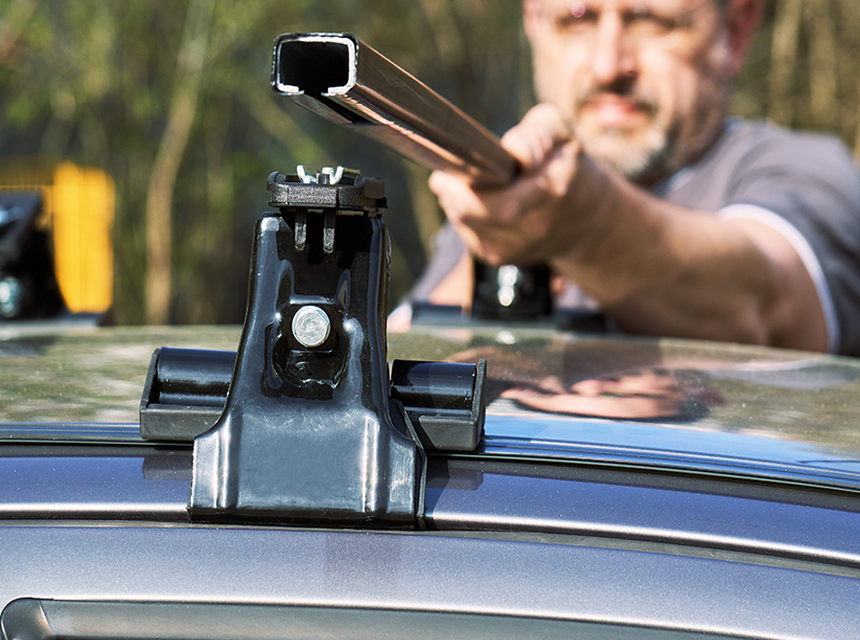
The tower is the part that follows immediately after the mount; it is the part of the rack that holds the weight of whatever it is you want to want (your kayak). Due to the load-bearing nature of the tower, it is usually installed on the part of your vehicle that is strong and has load-bearing abilities.
The tower is usually connected to the mount at the bottom and holds the crossbar at the top.

This is the commonly known component of roof racks. The crossbar is the long bar that is usually installed horizontally across the length of your vehicle; they could be more than one, two in most cases. The crossbar is very important because it provides you with the space you need to mount your kayak.
The crossbar is usually held in place by the tower, which also connects it to the mount.
Installing a kayak roof rack is not as difficult as you might think, and you will have a great time installing if you follow the steps provided.
Before we go into the steps for installation, it is vital to note that not all roof racks look the same; some vary in terms of the kind of vehicles they are compatible with. For example, there are some racks that are designed perfectly for trucks, and some are more fitting for small cars. However, they still all have the same basic structures, so you can rest assured that these steps will work for any type of kayak roof rack.

To successfully carry out your kayak rack installation, you need to verify the type of roof of your vehicle. All vehicles don’t have the same roof. Some come with attachments from the manufacturers called raised rails, while some don’t have any form of attachments; they are often referred to as naked backs.
For vehicles that come with raised rails, the manufacturer has already prepared the vehicle for roof racks and has made provisions on the roof such as rails and holes for direct attachment of your roof rack. However, vehicles with naked roofs will need some extra components before any rack can be installed.
For naked roof vehicles, you will need to get a roof rack adapter that will allow you to attach your mount to the roof and also conveniently bear your rack’s weight. Also, there are some other ways that you can transport your kayak without using a roof rack; this is also a valid option if your vehicle has a naked back.
After checking your roof and determining if it is a naked roof or if it comes with a raised rail, the next step is to know your vehicle specifications. We mentioned earlier that there are different types of roof racks, and even though they might have similar components, they still differ in some ways, such as size and the likes.
Before you go ahead to install a roof rack, ensure that it is compatible with your vehicle; you can use information such as the brand and year of production of your vehicle to determine the type of rack that will fit your vehicle.
You must install a roof rack that is appropriate for your vehicle because research has shown that roof racks contribute to fuel consumption Trusted Source Fuel consumption impacts of auto roof racks | ResearchGate The after-market roof rack is one of the most common components attached to a vehicle for carrying over-sized items, such as bicycles and skis. www.researchgate.net , so having a rack that is not suitable for your type of vehicle can significantly increase the fuel consumption rate

Once you’ve got a rack that fits your vehicle, you can now move on to installing it. The first step is to couple your mount to the raised rails or the roof rack adapter. We mentioned before that the mount is the foundation of the roof rack, and it provides stability for the tower.
To attach the mount, you might need to use screws to fit it into the holes provided. Ensure that you use the right screwdriver for the screw head. Also, when fixing your mount, it is essential that you fix it on the part of your roof that is very sturdy (has load-bearing capacity).
In some cases, you might need to make holes for your mount, which is common to vehicles with naked roofs.
Once your mount is ready, you can move on to set up your tower. The tower is attached to the mount. There are different types of towers available, some are screwed onto the mount, and some have a lock mechanism that attaches them to the mount and serves as a precaution against theft. The type of tower you get is dependent on you and the type of rack you want to set up.
The crossbar is the next component that needs to go on the rack. Once you’ve finished setting up your mount and attaching your tower, you will notice a space or a compartment on the top of the tower; the compartment is meant for the crossbar. The crossbars mentioned earlier are the long bars that are included in your rack kit.
The number of crossbars you can use on your rack depends on the type of rack you buy, and some racks allow up to 2 crossbars while some can only accommodate one. Also, the top of your tower varies; some are designed to have locks to keep the crossbars in place and prevent stealing as well.
At this point, your kayak rack is assembled and ready to be mounted. At this point, knowing the type of your roof comes in handy because the type of roof will determine the manner or method you will need to mount the rack.
Vehicles with naked roofs will need to use a rack adapter before the rack can be mounted. However, you can go ahead with your kayak rack installation for vehicles that come with preinstalled rails.
Apart from the main kayak roof rack kit, there are still some other minor accessories that will come in handy when you’re loading up your kayak. These accessories can be used to secure your kayak further, and for other functions, they include; tie straps, rack pads, rack slides, rack tent, and more.
The type of accessories you get depends on your needs. For example, some accessories like that kayak rack tent can be used to cover the kayak while you’re on your way; it is not necessary.
So far, we’ve discussed how to install a kayak roof rack and things to know when installing it. However, there are other types of kayak racks for different purposes. One of such racks is the storage rack; storage racks are for when you’re not making use of your kayak. You can store your kayak in a proper and efficient manner using storage racks and some efficient storage racks that will work perfectly for you; an example is the Freestanding 175 Weight Capacity Dual Stand; it can hold up to two kayaks conveniently.
Kayak racks are a significant addition for kayak users because you can now go anywhere you want with your kayak and have a good time. With the steps and tips that we’ve provided in this article, you will be able to set up your rack in no time and to your satisfaction.
A good kayak rack should be accompanied by a fantastic kayak like the Lifetime Tamarack Angler Kayak, which is lightweight and easy to transport.
We’ve come to the end of this article, and we’re sure you’ve learned a lot about how to install kayak roof racks.